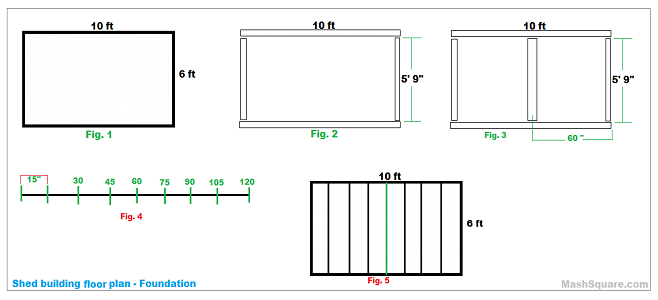
Compiled diagrams for the shed foundation.

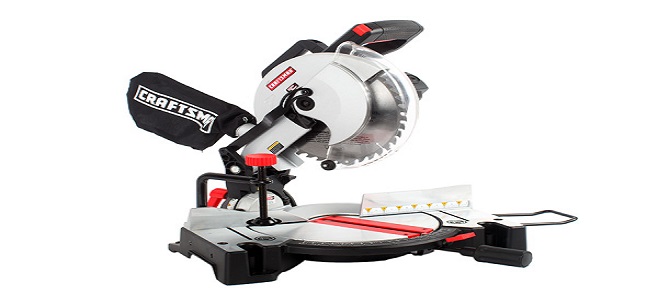
For every project, there are tools needed to get the job done. Power tools make is so much easier, efficient and faster to complete many projects. As a home owner, there is a need to have some sort of power tools such as a power drill. The list below shows recommended power tools needed to build a shed. However, you do not have to buy the same tools shown below as there are many other similar power tools available. If you are a handy person, you probably already own most if not all the tools needed. In that case, you only need to purchase the materials and you are good to go.
Now that you are aware of the power tools needed, let us start the building process with the foundation or base.

These tips may be helpful to some of you, especially those who have not built anything before. The shed building tutorial provided on alwasely.com website should only be used as a guidance to help you build a shed or a barn of your choice.
The size of the storage shed you plan to build will depend on your specific needs. However, to avoid some of the mistakes that most beginners make prior to starting your shed building project, see tips below:
- Building your shed on a flat surface saves so much time and efforts. If your backyard is slopped, then you may need to use two support columns (i.e. 4-in x 4-in) .
- Wood come in different sizes. For example, a 2-in x 4-in x 8-ft size wood means, 2-inch thick, 4-inch wide and 8-feet long. However, what matters are the actual dimensions. In the example given above, pay attention to the wood specification (Common: 2-in x 4-in x 8-ft; Actual: 1.4687-in x 3.4687-in x 7.9375-ft).
Why actual dimensions matter?
- Great question! It is very important to measure the actual dimensions before starting to cut the wood. That way you know exactly how long each piece of wood should be when constructing the shed building frame.
Determining power tools and materials needed before hand is an excellent idea. Some of you may already have some of the power tools which is great. However, if you need to buy new power tools and obviously the materials needed to complete the shed building project, it may be less expensive to purchase already built shed from your local home improvement center (Lowes, Home Depot, etc.).
If you decide to build it yourself, check out the shed foundation instructions.
Before starting any project, it is always a good idea to estimate its cost. Whether you are planning to build a shed, a website or any other project, knowing the cost ahead of time helps making an informed decision. Unless you have power tools needed for a certain project, the cost of purchasing needed tools should also be taking into account.
The materials needed for your building project will depend on various factors such as size/dimensions, type of materials used, etc. The list of materials and tools below only applies to the tutorial described. As previously indicated, the list of materials is an estimate and should not be misunderstood to mean everything needed to complete the project.
- Miter saw – Craftsman Craftsman 7 1/4-Inch Sliding Compound Miter Saw
- Miter saw stand – Craftsman Universal Miter Saw Stand
- Circular saw – Black & Decker 20-Volt MAX Lithium-Ion Circular Saw
- Cordless drill – Black & Decker 12v cordless drill
- A level – Stanley 42-324 24-Inch I-Beam 180 Level
- Measuring tape
- Carpenter’s square tool
- Tool apron with pockets
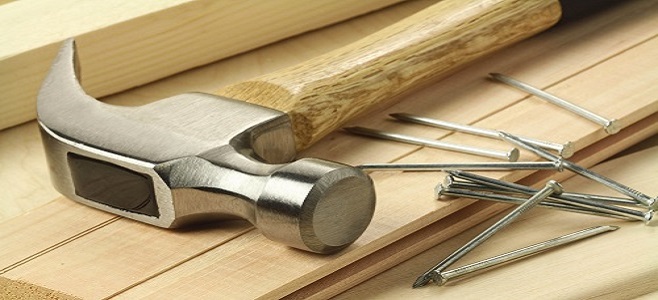
- A hammer
- Steel Stapler or Hammer Tacker Stapler
- Utility knife
- A ladder
Building materials:
- 6 concrete block – foundation
- 1 bag of concrete
- 2 (2-in x 6-in x 10-ft) weather treated wood
- 10 (2-in x 6-in x 6-ft) weather treated wood
- 11 (1-in x 6-in x 6-ft) weather treated wood
- 2 (1-in x 6-in x 8-ft) weather treated wood
- 7 (2-in x 4-in x 10-ft) – standard wood
- 32 (2-in x 4-in x 6-ft) – standard wood
- 9 (2-in x 4-in x 8-ft) – standard wood
- 7 (4-ft x 8-ft) – regular plywood plates
- 11 (4-ft x 8-ft) – weatherproof siding plates
- 3 Roof shingles to cover 80 sq. ft.
- 1 Roof underlayment
- 1 Box of galvanized nails (3.5-inch long)
- 1 Box of weatherproof screws (3.5-inch long)
- 1 Box of weatherproof screws (1-inch long)
- 1 Box of roof nails
- 1 Bag of cement mix (at least 50-lb)
- 1 Sliding door latch/gate
- 3 barn/shed door hings
- A window
Optional for the area around the shed:
- 2 (1-in x 8-in x 12-ft) weather treated wood
- 2 (1-in x 8-in x 8-ft) weather treated wood
- 2 Side vents
- 5 LED Solar Shed Light – having a light in a shed is not a bad idea.
It is worth checking the cost of materials before starting the project for at least two reasons: 1) Deciding whether it is worth building the project or not. 2) If so, placing a single order for all the materials needed at once to save on delivery charge.
Ready to start the shed project? Let us start with the foundation.
The shed building instructions provided on alwasely.com website should only be used as a guidance to help you build a shed or a barn according to your needs. I just thought sharing my personal experience may help you better plan your building projects.
 The first question that needs to be asked before deciding to build a shed, purchase one or hire someone to build a shed is:
Is there a need for a shed?
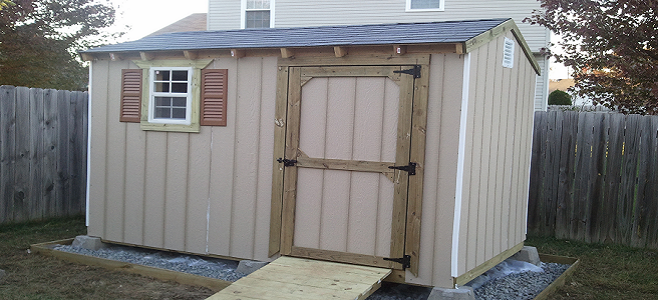
In reality, the primary reason for buying or building a shed is to have extra storage. This may sound a bit silly if I tell you that the main reason, at least in my case, having exterior storage to place the lawnmower inside. We had plenty of space to store the lawnmower inside our garage but it means cleaning it after every use and also placing something underneath it in case of oil leakage which can cause a mess on the concrete floor of the garage.
Regardless what your reason(s) for having a shed, it simply just means you need extra space. Now, the question is should you buy a shed or build one yourself?
Buying a shed vs. building:
To be honest, this was the first question I asked myself. After visiting more than one local home improvement center, I decided to build a shed myself. Not really just to save money but to also enjoy the experience. You don’t have to be a skilled person but it helps if you have done woodwork before. It just makes the process much more smoother.
If you have already decided to build your own shed yourself, make sure to check the city/county requirements before moving forward. Depending on the size/square footage of the shed you are planning to build, you may be required to obtain a permit from the city/county.
Follow the steps below: 
Step 1:
Before you head to your local home improvement center (Lowes, Home Depot, etc.) to purchase materials, have a sketch of the shed you’re planning to build. Something like the diagram to the left.
Now that you have created a drawing of the shed you will be building, let us do some math before going wood shopping.
The following is a calculation for 6 ft x 10 ft, your calculation will be different based on the size/square footage of your shed. You should probably check these building tips before cutting any wood.
To calculate the area/floor of your shed, multiply width by length. In my case (6 x 10 = 60 sq. ft). You are probably thinking 60 square feet is good enough but wait… that is the exterior area but in reality, the interior is approximately (5’5″ x 9’5″ = ~ 52 sq. ft.), so you just lost around eight square feet. Let’s just say that is another thing I didn’t account for prior to starting the building process.
Step 2:
After you decide on the size of the building, it is always a great idea to estimate the cost of the materials needed to complete the shed project. Your initial estimate of the cost of materials should help you decide whether it is better/cheaper to build one yourself or buy a shed that is already built. If you plan to build a shed like the one described in this tutorial, check out the materials and power tools needed to complete the shed project.
Now that you are ready to start your shed building, let us start with the foundation.